Sunday, November 11, 2012

Chickens...

I can tell you (and it is no secret) that I am 100% a city girl. Fishing, farming, and hunting were exotic things that I never did. Oh and chickens. When I was in 5th grade we moved to a different area of the city and someone in the neighborhood HAD CHICKENS! This was a huge deal. Fast forward many years and here we are.

I live on a coffee farm. I have chickens. Not going to lie, when I said "we can get chickens after you fix the coop" to my husband I was totally not expecting him to fix it that day, and go get chickens while I was at work. But he did and we have chickens.

At this point, us and the chickens is already a funny story. We have had them for a little over a week, and already have been having some crazy adventures. First thing you need to know is that here in Hawaii, we have wild chickens. Lots of them. The area I live could give Kauai a run for its money in terms of chickens. The first night we spent in the new place I was about ready to kill the roosters by the time the sun came up. I am sleeping through them better....

The "official" bird of the Island of Kauai!

So chickens. My husband went and picked up a rooster and three hens from an acquaintance. The rooster is beautiful! He is a huge black rooster with iridescent feathers. Being the cheeky late 20 somethings we are... we named him Black Dynamite in the hopes that he would continue to have lots of bitches (hens).

Black Dynamite

Well that first night, two of the hens made a break for it. The next morning? he only had 1 hen. We were sad. But we saw the other ladies hanging around and had high hopes of re-integration once the 3 day forced incarceration in the hen house was over.

Then the wait was over... over strode Black Dynamite followed by his main bitch (a beautiful large red hen) out into the coffee farm to explore. He immediately got in a fight, lost, and his hen followed the other rooster. That night only the one red hen was back, and for the next few days Black Dynamite would wander the farm, alone, but she would be back at night. Then about Wednesday last week she didn't come back. Black Dynamite was SO SAD! He didn't even caw in the morning. So, we got two new small hens!

New hens!

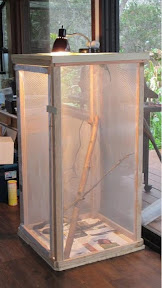
They are all still in the hen house for their 3 day trial. These young ones are spirited, and we have high hopes for them! Also the escaped hens and the large red hen have been hanging around. We hope all will be reunited soon!

Monday, October 29, 2012

I moved to a coffee farm!?

That's right. I moved to a coffee farm!

I really am up for a crazy new experience! My husband and I moved onto a coffee farm this month. We are now the caretakers of the farm house and the irrigation system. It is already been a learning experience!

I will be sure to keep you updated on the craziness around here!

yummy coffee!!!!

Friday, June 22, 2012

DIY handfasting cords

I ended up buying some thicker cord and instead of braiding them together (which would have looked awesome) went with a 6 cord look.

Now I wanted to add beads and knots, I knew that so I went on an internet hunt and found this awesome one: Monkeys Fist

I looked up a few youtube videos and practices a few times and then went to work knotting one of each of my 6 ropes. I then went to bead store and got some bobbles for the ropes. 
I went with one dangly one and one simple one per rope. 

TA DA 
That is 6 ropes and some wonderful Kona Coffee! 

Now in order to keep my ropes nice and happy, and for after the handfasting I bought a nice box to keep them in. So here they are in their forever home! 

I'm happy with the box too, I think its super cute!


Thats all for now!


Tuesday, June 19, 2012

Oh god....


That is what my mom said when I told her I was making my dress. But never fear! I am almost done! Like I said in the previous post I already for married last year, and this event is more of a reception just a year later.

I got married in a dress I made last year, and so the idea of making another dress is not totally out of left field. It’s just that, I'm super busy... so... this was an crazy idea. I basically took 2 weekends off the calendar and worked. I have 2 more weekends, and I am almost done.


I also purposely went for an easier pattern, and I am happy the way it is turning out. I still need to sew a sash, attach the lining for the skirt, the zipper and hem.

SO CLOSE!

I'm not sure I recommend sewing a dress the month before the event, but it has been calming to just sit down and sew.

Wednesday, May 30, 2012

handfasting: making the cord

I am already legally married.
So I can do whatever the hell I want! It is a wonderful feeling.

So, we are going to get tied together! Handfasting!

Handfasting is something that I see echos of all over the place. Some eastern traditional weddings there are either ropes or cloths or something tied or draped over the couples hands. There is also the phrase "tying the knot". This seems like a ritual that is so full of imagery and meaning and history.

Now comes the hard part. Making the rope and writing the ceremony. I found one online that had a motif of hands. I liked that one a lot.

I am working on the making the rope part first and thinking about the wording and ceremony as I go. My husband wants to use a knot that he can write meaning into. I am excited that he is getting into this as well.

So. Onto making the rope.
I really like this design!
I bought three cords today at the fabric store. I am going for jewel colors. deep and rich. Purple blue and green. Now I need to braid it. I like that this braid looks thick and round. So I spent some time googling around and found this video. 


I need to practice... first pass didn't go so well 

So I am working on it! I'll let you know how its going!

DIY wedding

I have no idea what I am doing.
No really.

I never liked weddings that much as a kid (and didn't really think I would have one, I saw myself more as the cat lady) and then I met this wonderful guy (awwwww). We eloped, and are now having a 1 year anniversary/wedding/party thing.

I really seriously have no idea what I am doing. I think I keep doing things backwards. I got the venue booked and then made the guest list. Invites are out and now I have to do the rest.

What follows is a series of posts about my lack of knowledge about how to plan a wedding. I tend to flip out every few days or so... should be entertaining....

~Pohaku

Saturday, April 28, 2012

Look! I can make things!

I tried to make coconut oil again last night and ended up with something closer to coconut jello. FAIL!

But I did manage to make an enclosure for a little guy I found in the middle of the road!

Spike is an invasive Jackson's Chameleon and is now our personal little dinosaur!

We had a small terrarium that we were keeping geckos in on and off ( we have a history of catching scaly friends) and that was just too small.

So off to the hardware store we went! I would like to point out that the tools we have are the following
- hand saw
- hammer
- converting screw driver
- staple gun
- leather man
- wire cutters and wire shears

We used to have more but we didn't bring much when we moved. So with some lumber screen from a repair if some kitty damage and our minimal tools we made this!


We are not done yet but it is functional and Spike loves his new home! He went exploring ( screen is way better than glass! He can hold on to screen!) and us currently sitting on his big stick with his tail curled up!

I am feeling accomplished and wanted to share a success!

Saturday, April 21, 2012

Coconut oil. Trial and mostly error

I will admit it, I failed miserably at my first two attempts at making coconut oil.
Here is a step by step of what I did and where I went wrong...

Attempt #1
- The first and easiest step for me in making the coconut bowls is having my other half, halve them and take out the coconut meat. I took the left overs from the latest bowl and used them for this first attempt.
- I them broke the meat into small pieces and placed them in the blender with some water. I added the water slowly until it all mixed well.
- Them I poured the coconut awesomeness into a large bowl.
- then I kneaded it for a while. (this got messy)
- I DID NOT THINK AHEAD and had to call for my husband again, and get him to bring me another bowl and a strainer.
- Messy hands and all I squeezed the coconut meat through the strainer into the other bowl. It felt awesome between my fingers!

I think to here I did ok!

Here is where I went wrong....
I put the mess on the stove. Once it was boiling it went CRAZY! I think there was more water in it then I was aware. According to the video I posted last time what I SHOULD have done was let it sit for a while and settle. Then the water would have partially separated from the coconut milk and it would not have boiled so violently. Well I didn't. It overflowed. All over the stove. At this point I decided to stop.

OOPS!
The left over coconut meat

Attempt #2
My thinking was "maybe the whole extracting the coconut milk AND making the oil was too much for the first time, I'll start with my canned coconut milk!"

- Emptied can into pot
- turned on heat
- waiting for a while
- watched it boil
- freaked out that it was taking too long and stopped.

I think I was on the right track and just quit before I was done! I kept the now concentrated coconut oil so I might give it another shot.
I think I am on the right track! 


Monday, April 16, 2012

Directions? Who needs that!?

Coconut oil is awesome! It is amazing for cooking, amazing for my coconuts, and awesome as a beauty project!

I can skim through some sites and videos and figure it out right?

NO!

First attempt ended in a HUGE mess, second? well not so hot either.

Next I am going to follow this video.

Sunday, February 12, 2012

How to make your own Coconut Bowl!

My tools of the trade! Machete, leatherman, sandpaper,
coconut oil, and block oil
How to make your own Coconut Bowl!

1) acquire coconut. 

2) if the coconut is not peeled like the one in the photo.... peel it. My husband uses the machete and the leatherman to pull strips off. 

3) Ok now you have a coconut ready for draining. Poke out the "false eye" its the one that feels/looks different

4) allow the coconut water to drain into a bowl or container. Drink it! Cook with it! I recommend cooking white rice in it and sprinkle the rice with cinnamon 

5) now you are ready to open the coconut. There are several ways to do this. First there is sawing it open, and second there is hitting it until it breaks open naturally. Although this second method does not guarantee nice even halves. 

6) Now you have a coconut that is open and full of yummy coconut meat! There are also several tricks for removing it. We put the halves in the fridge for a bit and then use a screwdriver or butter knife to get between he shell and meet and pry it out! 

7) Ok now you also have yummy coconut meat and are ready to start on the shells to make the bowls. I know we already are at step 7. Go ahead take a break and enjoy the soils so far!

8) take one half, and the largest grit sand paper you have! I use a "Craft" set so it is about 80 grit. Remove the large hairy outside stuff. I tried steel wool for this as well but the sand paper works the best. Sand it down so you have a nice even dark brown color all over the outside. 

9) take that same grit and start working on the inside as well. 

10) grab the smaller grit and repeat on the outside and inside

11) grab your smallest and finest grit sand paper and give the outside and inside a polish. Your fingers should REALLY but hurting by now

12) let the halves dry out (or this can be step 7) 

13) I normally give it one last polish and then rinse and dry again

14) now apply some coconut oil or other block oil to the whole thing. It should soak in so give it a few more coats, mostly on the outside.

15) I use a butch block oil and finish on the inside because I know it is food safe and should give it a good seal. 

16) for the block oil apply 1 coat and let dry for 6 hrs

17) apply second coat after scoring the first coat with the fine grit sand paper

18) let dry for 72 hrs

19) wash the bowl

20) dry

21) one last layer of coconut oil on the outside

TADA! Of course you can also just buy one of mine ;)


Thursday, February 2, 2012

Coconut Bowls - almost to the point where I can say I am almost finishing them

 The finishing of the insides is coming long! We got some of our tools with the latest visitors and I went to town on the inside of this one... went a little too far in one spot but this set is for me! Next step is to try and decide on a finish for the inside.
I wanted the inside to be "food safe" but with a little more oomph then just oil. So I set my husband doing some research and did some research of my own! I found this nifty site that had some snark (always a plus) and think I know what I am looking for now.

I think the winner is shellac. Now I just have to find some.... I hope I can find some in town! :) Wish me luck!

Mamaki Tea

Mamaki tea is made from the leaf of the Mamaki tree. Pipturus albidus or Mamaki is flower plant endemic to Hawaiian and in the nettle family. Growing up in the Pacific North West I am very familiar with another nettle, the stinging nettle. Even from a young age I knew that the stinging nettle had beneficial qualities, and could, if carefully harvested used as a salad green or made into tea. The photo to the left is an example of a small Mamaki I found while out in the woods. 


Before I get into Mamaki I figured it would be useful to detail some information about the stinging nettle in case you, my lovely reader, were not familiar with it. Stinging nettle gets its name from the hollow stinging hairs on its stems, and the undersides of its leaves. In order to harvest the plant without being stung, grab the leaves by the top so it folds in half and rub the bottom together. This squishes the stinging hairs. You can also use gloves. As a child in the NW I was always fearful that I was going to get stung anyways and even after long rubbings of the leaves it normally took a dare to get me to eat it. If while you are out you do end up getting stung, normally some sward fern grows next to nettle plants and the seeds of the underside of the sward fern can be used to relieve the sting. After bushwhacker through a ton of it one day growing up I also caked on mud and that helped. I am not familiar with the exact medical uses of the stinging nettle other than "its good for you", but it is also used as food, as a tea, and as a fiber to make textiles. 


Ok, now onto the star of this blog post. Mamaki! According to the "Hikers Guide to trail-side plants in Hawaii" (1) the mamaki is a "shrub or small tree up to 20 ft tall with coarse alternate broadly oval leaves that are ofter wide as they are long, come to a sharp point, and have small teeth along the edge. [...] The leaves are green above and often pale, almost white, with fine hairs, beneath. The veins often have a reddish tinge." This red vein in the leaves makes then very striking. You can see how it makes them stand out in the image above. "The Hawaiians used the fibrous inner bark of this plant to make one kind of kapa (fabric), and the mucilage from the bark was used to help glue layers of the kapa together. [...] A tea was made from the leaves and drunk as a tonic." 


That tea is what I am after. I have had some since moving here and it is AWESOME! The nettle tea I always made at home I felt tasted like grass. This has more of an herbal tea taste. So I gathered some leaves while I was out the other day and they have dried and I think tomorrow I am going to make some tea. 


I also bought a new Mamaki tree for my yard since the one we have is TALL and old and the nice looking leaves were hard to reach. 


1. Hall, John B., 2004, A Hikers Guide to Trailside Plants in Hawaii, Mutual Publishing. http://hikersguidetoplants.com/

Friday, January 20, 2012

Coconut Bowls update

Coconut bowls again!

There is a finish on one of the bowls! I decided with coconut oil for the finish on the bowls, for the exterior at least. I think they look rather nice! I was not too sure about just the oil as a finish so I am going to wait and see what it looks like after I let it dry a bit. 

I am still not too sure about what I am going to do with the inside of the bowls yet. I guess I need to decide if they have to be food safe or not. I am leaning to the "not" for personal use, but I could see how it would be cool to use them as bowls. Or as cups like they do at the Kava Bar. I am also going to try and find a few other big coconuts this weekend and start another pair. I would eventually like to put these up for sale but we shall see! 

I am also not sure I like the color of the insides. I am sure if I spent hours with the sand paper I could get a dark interior, but, to be honest, not sure my hands would like that too much. I may take some oil to the inside and see what it looks like, and how much it soaks up. 

Again I still have not decided yet, but I am proud of the progress! 

~Pohaku

Monday, January 16, 2012

I don't even know what I want to do with the oils, I just want to make them!

Oils

For quite a while now I have wanted to make oils. Problem is, when I stop to think about what kind of oils, or what I would use the oils for, I draw a blank. I just want to MAKE oils! I decided to start with something easy. I started with cooking oils. I heard or read somewhere about infused olive oil for cooking and decided to start with that.

I sautéed some peeled garlic and rosemary in olive oil and then poured it into an empty large vodka container that I had washed. I then (mostly) filled the container with our remaining olive oil, and it is currently sitting in my kitchen. My husband does most the cooking, so he will have to give me a review when he uses it. Normally he adds garlic and rosemary to things, so I thought it would be a good combo to start. It in no way looks as pretty as the picture I used but we shall see.

On to other oils. I was looking into base oils for things. What things? I don't know yet! I saw something about using baby oil as a base for massage oils; so I put some in a jar with my dried lemon verbena and some mint. Minty fresh massage oil? I don't know how it is going to turn out yet so we shall see!

I think my aim initially was to make my own essential oils. However, since that requires way more equipment then I have, I think I am going to try other ways to make aromatic oils. I still have no real idea about what I want to do with them, but that is the point right? Don't think about it just do it! Make oils! Figure out what to do with them later!

~Pohaku

Sunday, January 15, 2012

Coconut Bowls

Coconut Bowls.

We have gone to the local Kava bar a few times, and they have these awesome coconut bowls that they use. They are natural, and simple, and slightly wobbly. I love them! There are a lot of coconuts around and I figured it would be fun to try my hand at making some bowls. It seemed simple enough when I googled it.


  • Open coconut. Check
  • Remove coconut water. Check
  • remove coconut meat. Check
  • TADA you have a bowl.

NOT SO MY FRIENDS! Let me be the first to tell you, that if you want a nice natural finish without the fibers like above... your work is only just beginning! To open, empty, and remove (as listed above) I used a handy tool called my husband, who then handed the resulting shell to me. I thought I was clever giving him the hard part, but I am still not done with my bowls!

Here is the first step, getting them open. I used HUSBAND! Super effective! 


This is a good shot of the side, you can see all the fibers still on there.

The meat is removed and the bowls are almost there right? WRONG!

The finish. The finishing of the bowls has turned out to be the most time consuming part of this project. Because this is my first set I decided to try two approaches: for one I used just sandpaper, for the second I soaked the outside first to see if that helped peel the husk remnants. The result of this informal "experiment" was that the soak did not appreciably help. Therefore, I have decided dry + sand paper is the best bet. I started with a 80 grit and then a 120 grit. I also have a 180 grit that I have yet to use, but I will later tonight. 

This is after a run with the 80 and 120 grit sand paper

That is my progress so far! I am still working on them and have not decided exactly how to go about finishing the outside and inside. Oil? Varnish? Any thoughts?

Also any tips on (faster, easier, less annoying...) ways to remove the fibers would be AMAZING!

~Pohaku (means rock in Hawaiian)

Saturday, January 14, 2012

I have absolutely no idea what I am doing!

Bath Salts

It all started with bath salts. A very innocent item I might add. I have a habit of thinking to myself, "I would LOVE to be able to make that!" and then I think, "but it must be hard...". Then the thoughts have a habit of drifting away. Well, one cold, dark, depressing Alaskan winter, I decided to do something about the lack of fun bath salts in my house, and googled "how to make bath salts". It turned out to be way easier than I was expecting. Long story short, I now have several mixes of bath salts at all times, and my baths are never salt-less.

But, I had no idea what I was doing. I just said "ok I am doing this", hunted down the ingredients, threw them together and said "ta da?", and somehow that worked. I then looked up bath bombs and decided they were too complicated.

How does that story have anything to do with this blog? Well, since bath salts ended up being easy, I decided this year to just start trying things. No more wishing and more doing, that is my New Year's resolution, DO and MAKE things. Easy enough, I think...

I hope this will not be too boring of a read, I intend to include my horrific failures along with my successes. So let us raise a glass to projects done and projects to do!

Bath Salts:
- sea salt
- Epsom salt (mostly this one)
- kosher salt
- essential oils

Mix it all together in a jar with a lid and shake and shimmy with it around the house! TA DA!

~Pohaku