Showing posts with label home. Show all posts

Sunday, February 12, 2012

How to make your own Coconut Bowl!

My tools of the trade! Machete, leatherman, sandpaper,
coconut oil, and block oil
How to make your own Coconut Bowl!

1) acquire coconut. 

2) if the coconut is not peeled like the one in the photo.... peel it. My husband uses the machete and the leatherman to pull strips off. 

3) Ok now you have a coconut ready for draining. Poke out the "false eye" its the one that feels/looks different

4) allow the coconut water to drain into a bowl or container. Drink it! Cook with it! I recommend cooking white rice in it and sprinkle the rice with cinnamon 

5) now you are ready to open the coconut. There are several ways to do this. First there is sawing it open, and second there is hitting it until it breaks open naturally. Although this second method does not guarantee nice even halves. 

6) Now you have a coconut that is open and full of yummy coconut meat! There are also several tricks for removing it. We put the halves in the fridge for a bit and then use a screwdriver or butter knife to get between he shell and meet and pry it out! 

7) Ok now you also have yummy coconut meat and are ready to start on the shells to make the bowls. I know we already are at step 7. Go ahead take a break and enjoy the soils so far!

8) take one half, and the largest grit sand paper you have! I use a "Craft" set so it is about 80 grit. Remove the large hairy outside stuff. I tried steel wool for this as well but the sand paper works the best. Sand it down so you have a nice even dark brown color all over the outside. 

9) take that same grit and start working on the inside as well. 

10) grab the smaller grit and repeat on the outside and inside

11) grab your smallest and finest grit sand paper and give the outside and inside a polish. Your fingers should REALLY but hurting by now

12) let the halves dry out (or this can be step 7) 

13) I normally give it one last polish and then rinse and dry again

14) now apply some coconut oil or other block oil to the whole thing. It should soak in so give it a few more coats, mostly on the outside.

15) I use a butch block oil and finish on the inside because I know it is food safe and should give it a good seal. 

16) for the block oil apply 1 coat and let dry for 6 hrs

17) apply second coat after scoring the first coat with the fine grit sand paper

18) let dry for 72 hrs

19) wash the bowl

20) dry

21) one last layer of coconut oil on the outside

TADA! Of course you can also just buy one of mine ;)


Friday, January 20, 2012

Coconut Bowls update

Coconut bowls again!

There is a finish on one of the bowls! I decided with coconut oil for the finish on the bowls, for the exterior at least. I think they look rather nice! I was not too sure about just the oil as a finish so I am going to wait and see what it looks like after I let it dry a bit. 

I am still not too sure about what I am going to do with the inside of the bowls yet. I guess I need to decide if they have to be food safe or not. I am leaning to the "not" for personal use, but I could see how it would be cool to use them as bowls. Or as cups like they do at the Kava Bar. I am also going to try and find a few other big coconuts this weekend and start another pair. I would eventually like to put these up for sale but we shall see! 

I am also not sure I like the color of the insides. I am sure if I spent hours with the sand paper I could get a dark interior, but, to be honest, not sure my hands would like that too much. I may take some oil to the inside and see what it looks like, and how much it soaks up. 

Again I still have not decided yet, but I am proud of the progress! 

~Pohaku

Monday, January 16, 2012

I don't even know what I want to do with the oils, I just want to make them!

Oils

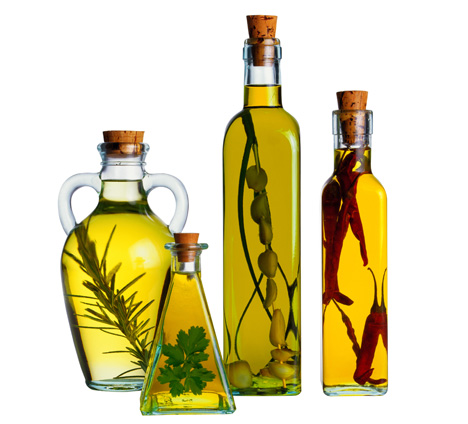
For quite a while now I have wanted to make oils. Problem is, when I stop to think about what kind of oils, or what I would use the oils for, I draw a blank. I just want to MAKE oils! I decided to start with something easy. I started with cooking oils. I heard or read somewhere about infused olive oil for cooking and decided to start with that.

I sautéed some peeled garlic and rosemary in olive oil and then poured it into an empty large vodka container that I had washed. I then (mostly) filled the container with our remaining olive oil, and it is currently sitting in my kitchen. My husband does most the cooking, so he will have to give me a review when he uses it. Normally he adds garlic and rosemary to things, so I thought it would be a good combo to start. It in no way looks as pretty as the picture I used but we shall see.

On to other oils. I was looking into base oils for things. What things? I don't know yet! I saw something about using baby oil as a base for massage oils; so I put some in a jar with my dried lemon verbena and some mint. Minty fresh massage oil? I don't know how it is going to turn out yet so we shall see!

I think my aim initially was to make my own essential oils. However, since that requires way more equipment then I have, I think I am going to try other ways to make aromatic oils. I still have no real idea about what I want to do with them, but that is the point right? Don't think about it just do it! Make oils! Figure out what to do with them later!

~Pohaku

Sunday, January 15, 2012

Coconut Bowls

Coconut Bowls.

We have gone to the local Kava bar a few times, and they have these awesome coconut bowls that they use. They are natural, and simple, and slightly wobbly. I love them! There are a lot of coconuts around and I figured it would be fun to try my hand at making some bowls. It seemed simple enough when I googled it.


  • Open coconut. Check
  • Remove coconut water. Check
  • remove coconut meat. Check
  • TADA you have a bowl.

NOT SO MY FRIENDS! Let me be the first to tell you, that if you want a nice natural finish without the fibers like above... your work is only just beginning! To open, empty, and remove (as listed above) I used a handy tool called my husband, who then handed the resulting shell to me. I thought I was clever giving him the hard part, but I am still not done with my bowls!

Here is the first step, getting them open. I used HUSBAND! Super effective! 


This is a good shot of the side, you can see all the fibers still on there.

The meat is removed and the bowls are almost there right? WRONG!

The finish. The finishing of the bowls has turned out to be the most time consuming part of this project. Because this is my first set I decided to try two approaches: for one I used just sandpaper, for the second I soaked the outside first to see if that helped peel the husk remnants. The result of this informal "experiment" was that the soak did not appreciably help. Therefore, I have decided dry + sand paper is the best bet. I started with a 80 grit and then a 120 grit. I also have a 180 grit that I have yet to use, but I will later tonight. 

This is after a run with the 80 and 120 grit sand paper

That is my progress so far! I am still working on them and have not decided exactly how to go about finishing the outside and inside. Oil? Varnish? Any thoughts?

Also any tips on (faster, easier, less annoying...) ways to remove the fibers would be AMAZING!

~Pohaku (means rock in Hawaiian)

Saturday, January 14, 2012

I have absolutely no idea what I am doing!

Bath Salts

It all started with bath salts. A very innocent item I might add. I have a habit of thinking to myself, "I would LOVE to be able to make that!" and then I think, "but it must be hard...". Then the thoughts have a habit of drifting away. Well, one cold, dark, depressing Alaskan winter, I decided to do something about the lack of fun bath salts in my house, and googled "how to make bath salts". It turned out to be way easier than I was expecting. Long story short, I now have several mixes of bath salts at all times, and my baths are never salt-less.

But, I had no idea what I was doing. I just said "ok I am doing this", hunted down the ingredients, threw them together and said "ta da?", and somehow that worked. I then looked up bath bombs and decided they were too complicated.

How does that story have anything to do with this blog? Well, since bath salts ended up being easy, I decided this year to just start trying things. No more wishing and more doing, that is my New Year's resolution, DO and MAKE things. Easy enough, I think...

I hope this will not be too boring of a read, I intend to include my horrific failures along with my successes. So let us raise a glass to projects done and projects to do!

Bath Salts:
- sea salt
- Epsom salt (mostly this one)
- kosher salt
- essential oils

Mix it all together in a jar with a lid and shake and shimmy with it around the house! TA DA!

~Pohaku